Skip to content
Zhi Lee Photography
  • About
  • Blog
  • Portfolio
    • Creative Portraits
    • Babies
    • Engagements
    • Weddings
    • Travel
    • Motion
    • Instagram
  • Weddings
    • Why Choose Us to Photograph Your Wedding
    • How are we different?
    • Investment
  • Awards
  • Contact
  • Shop

Home » Archives for June 2014

Tutorials

Photography Inspiration from Google Images

  • June 30, 2014
  • by Zhi Lee

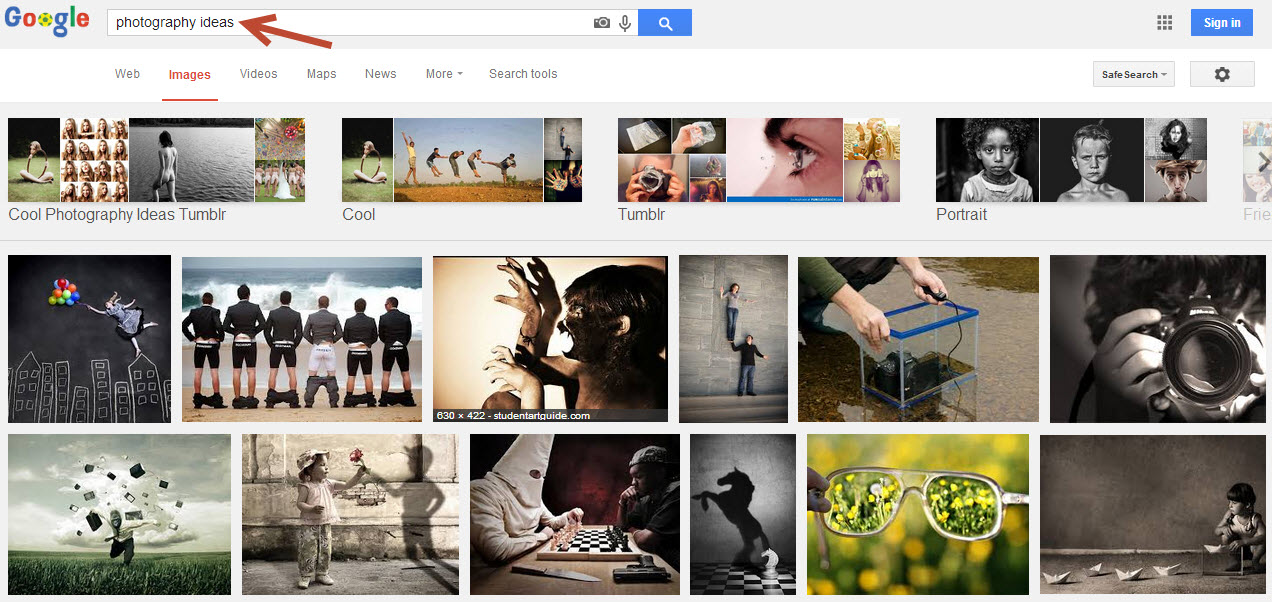
Lately I’ve been getting lots of inspiration from Google Images for my creative work and stumbled across a neat feature that’s worth sharing!!

Google recognizes that you’re looking for photography inspiration if you type in “photography ideas“.

And it organises them by category for you.

Typing "photography ideas" into google images gives you nicely categorised ideas for your next photography project!
Typing “photography ideas” into google images gives you nicely categorised ideas for your next photography project!


And if you’re looking for ideas in a particular genre or category, type it in!

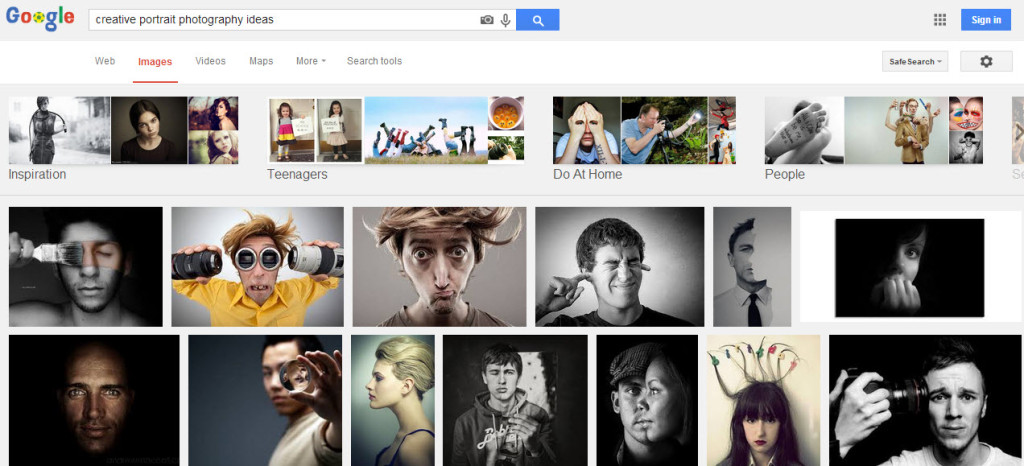
“Creative Portrait Photography Ideas” yields this!

Using Google Images for photography inspiration

Thank you, Google!


Creative

Getting Creative with Fire and Gels

  • June 29, 2014June 30, 2014
  • by Zhi Lee
Creative Portrait lit with Fire and Red Flash Against a Black Backdrop. By Zhi Lee

Flash gels are pieces of coloured transparent plastic film that you can place in front of a strobe or external flash to change the colour of light being emitted.

In our last post post about fire photography, we described the setup for photographing fire.  In preparation for our creative shoot next week, we had a second round of fire photography, this time in combination with coloured gels.

One of the difficulties we encountered was that white cornflour dust would show up starkingly white when flashed with white light, as in the picture below.

White flash on cornflour dust yields very white smoke.  You'd want to place a coloured gel in front of the flash if all that white isn't to your taste.
White flash on cornflour dust yields very white smoke. You’d want to place a coloured gel in front of the flash if all that white isn’t to your taste.

Playing the reflective properties of the white cornflour dust to our advantage, we placed a piece of red cellophane in front of the flash.  These are cheap and easily obtainable from a dollar shop.

Observe the drama added to the setup.

Cornflour Dust Lit with Red Gelled Flash and Fire


We did have to spent a bit of time cleaning up the mess we made 😛

But the results were worth it!

Cornflour dust in flames against a black backdrop


These images were created in safe conditions with water and fire extinguishers within easy reach.  Be safe and have fun!

Zhi

  • Aperture: ƒ/6.3
  • Camera: Canon EOS 6D
  • Focal length: 165mm
  • ISO: 200
  • Shutter speed: 1/160s
Canon 50D 50mm f1.8 Travel

The Best Camera is the one you have with…

  • June 26, 2014June 29, 2014
  • by Zhi Lee

You know they say “The best camera is the one you have with you”.

Today I Googled myself.  You should try it.  You’d be surprised at how much of a trail you leave on the Interwebs.   In my case, it was positively refreshing to see my photographic work listed on Google, including a picture of this cute Shitzu.  I think its a Shitzu.

Canon 50D 50mm f1.8
Cute shitzu on the streets of Hong Kong with sign warning passer bys to keep off!

Turns out, I entered a pet photo contest way back in 2011, and got a commendation (1 of 12 images selected from an entry pool of 7000!).

Looking at the meta data on the image reveals that it was taken with my very old Canon 1000D + 50mm f1.8 lens (a kit worth about $300 today).  These days I lug around a full frame Canon 6D with a few bigger and significantly sophisticated lenses but I truly do miss having the versatility of the cheaper and more portable combination.  Some of my friends like Sven Shroeter from Bokeh Monster have made the switch to mirrorless (check out his amazing street photography), and he’ll probably be sending me a message saying “I told you so” in the next 30 mins :p

Long story short – that saying yields true.  I have enjoyed working with smaller SLRS, the trusty iphone camera, compacts and even the GoPro!  This little short was captured completely on a GoPro camera, perfect for travel:

Zhi and Violet’s Trip to Nadi, Fiji from Zhi Quan Lee on Vimeo.


You can take great images with whatever gear you have.  Just get out there and have fun.


More photos from that Hong Kong trip:

Taken with a Canon 1000D


The big brother to the Canon 1000D is the 1100D retailing for less than $500 with a 18-35mm kit lens from one of these stores.

[fbshare type=”button”]

  • Aperture: ƒ/2.2
  • Camera: Canon EOS 1000D
  • Focal length: 50mm
  • ISO: 200
  • Shutter speed: 1/80s
Creative

A Photographer and his mate get hold of corn…

  • June 21, 2014January 7, 2017
  • by Zhi Lee

In preparation for our Dark Angel creative shoot, Vijay and I practised creating and photographing flames in the courtyard.  Safety measures were taken with fire extinguishes in place and the experiment done on hard brick, away from any flammable hazards.

Ignited corn flour against a black backdrop.

Here’s how it was done.

  1. Tape the funnel to one end of the hose and the other to an air pump
  2. Tip corn flour into the funnel
  3. Position a fire starter above the funnel and light it.
  4. Compress the air in the air pump and release the air.
Setup for Corn Flour Fire Photo Shoot
Copyright Vijay Prema and Zhi Lee
Blowing Corn Flour into a Flame
  • Aperture: ƒ/11
  • Camera: Canon EOS 6D
  • Focal length: 105mm
  • ISO: 100
  • Shutter speed: 1/500s
Tutorials

Free Lighting Diagram Tool for Photographers

  • June 8, 2014
  • by Zhi Lee


I have been looking for a tool to improve the very loosely sketched up lighting diagram for my Dark Angel shoot and stumbled across the Online Lighting Diagram Creator

Before:

Elevating Angel Concept

After:
Dark Angel Shoot Lighting Diagram


Elements can be added and dragged around easily.  My only gripe is you can’t add your own assets to the diagram.  With a little bit of imagination and improvisation, I used a tungsten light bulb to represent fire!  They do however have a Photoshop temple with all the symbols you need to create your own diagrams in Photoshop

Here’s the tool embedded or you can visit their website


Tutorials

A Beginner’s Guide to Post-Processing

  • June 3, 2014June 4, 2014
  • by Zhi Lee

Last night a friend asked if I could recommend some post-processing software.  She’s been taking great photos with the Sony NEX-5 and was curious about my workflow.  So I thought I’d go above-and-beyond merely recommending software, and explaining abit about post-processing in general.

What is post-processing?

Post-processing is the process by which a photograph gets treated after the shutter has fallen.  In the good old days, it used to be applying tints in the darkroom, dodging (darkening) and burning (lightening) by masking and exposing parts of the image on light sensitive film, and using cotton swabs to brush on chemicals to achieve various effects with a photograph.  It allows as little or as much creative input to be added after a photo is taken.  Of course, it is never a substitute for getting it “right” in camera, but adds a whole realm of possibilities not achievable through the lens alone.

These days we have a plethora of image editing programs (both free and paid) that gives a photographer the same level of flexibility with more ease and accessibility?

Should I post-process?

Some photographers swear by post-processing and edit every single photograph they take.  While I don’t disagree with this approach, for me the additional labour takes the joy out of every image.  With every click, I’d be thinking – “Oh no…. another image to post-process”.  Over the years, I’ve gotten pretty good of getting what I need straight out of camera.  The ability to visualise and execute is key to a photographer’s toolkit.  For my travel photographs, I only post-process the key shots.  The post processing treatment for these images is often pre-conceived, at the point of pressing the shutter! So it’s not editing for the sale of editing.

A typical workflow

These are the typical things I do for my images. I say “typical” because every image is unique so there isn’t a blanket rule that will apply to all images. Sometimes it simply takes a little experimentation and imagination! All of the techniques below can be done at a generic (image) level or localised (small area) level with a brush.

Cropping

this is almost the first thing I do with any photo. Cropping into part of a photograph or even reducing the bigger picture slightly can cut out distracting elements and bring the subject in closer. Here is an example of a stronger image produced as a result of cropping.  A useful tip is to press SHIFT while cropping so that the original aspect ratio is maintained.  This is important if you shoot in the default 4:3 ratio and would like to print your photos (maybe not now, but at a later stage!).  I like to keep the cropping consistent across a set of images so they look like part of the same set!

Example of Cropping in Lightroom

Exposure adjustments

While lightening or darkening a photo can compensate for over or under exposure, you can also completely change the mood of a photograph.  You may also want to do this on a smaller scale on parts of the image. Darkening overly bright distractions will have a de-cluttering effect, allowing the viewer to focus on what’s important. Here is an example of darkening or “dodging” done effectively.

Lightroom Example - Before dodging
Notice the bright area on the top right which distracts the viewer from the main image
Lightroom Example - After dodging
The bright area after dodging. Gone!


Vibrance

I like to boost the vibrance of the image slightly just to give it a bit more pop.  I compensate for this by reducing the saturation slightly to keep the image looking natural.

Temperature adjustments

Sometimes the camera gets confused about the temperature of the light sources in the image.  It’ll try to do its best by compensating for the main light source, but sometimes you just need that extra bit of control.  In the dodging example above, you’ll notice that the left part of the image has cooler (bluer) lighting, whereas the right side has warmer (yellower) lighting.  Using local adjustments, I was able to make the blue “bluer”.  That and a combination of all the above techniques yields this before/after comparison. Quite something huh!

Example of post processing using exposure, temperature and vibrance adjustments


Software

Here are a few options.  My personal choice is Adobe Lightroom.  A free trial is available.  It is reasonably priced.

Adobe Lightroom

But if you prefer something cheaper (i.e. free), try Photoscape.

Photoscape


Have fun!

Creative

Elevating Dark Angel

  • June 2, 2014June 27, 2014
  • by Zhi Lee

A Casting Call in Epic Photography

Lately I’ve been following Benjamin Von Wong and getting sparked up (notice the pun as you’ll see later :)) with ideas for a new concept. Von Wong is known for his “Epic” imagery which are products of a good vision combined with exceptional lighting, and of course a large budget (which is something we don’t have!).

Copyright Benjamin von Wong.
Image by Benjamin Von Wong

The concept I’m working on came together as a result of:

  1. The desire to buy a portable power source for the 600W Studio Strobe I already have
  2. The desire to work with a powerful strobe outdoors with a large softbox.
  3. An urge to shoot fire.
  4. A strange recollection of a fire photography tutorial by Kai Man Wong from Digital Rev TV


With a very little bit of Google Image’ing, these images came up:

Image by Kevin Garrison
The Arrival by Kevin Garrison
Archangel Tyrael
Image from Wallpaperstock.net

Here’s the setup in my head.  A model in a black lingerie or nude, with black angel wings (from Trademe), in a dark forest setting (there are some secluded forests near Piha, easily accessible away from the crowds), back-lit with a large 80cm x 120cm softbox, elavating in mid-air (by means of skillful jumping), captured through flames between the lens and model.

Elevating Angel Concept

With this I’ll leave you with a casting call, and a quote from Benjamin von Wong.  If you’re a model, photographer or pyrotechnics specialist interested in working together on this concept,  contact me.

[quote]Being creative is a way of life[/quote]

– Zhi Lee

Recent Posts

  • Beautiful Marlborough Sounds
  • Movember at TradeMe
  • Trade Me Auckland Office Photos
  • Setting up a New Photo Studio
  • Tips for Mum’s and Dad’s preparing for a Baby Photo Shoot

Archives

  • December 2016
  • November 2016
  • October 2016
  • April 2016
  • October 2015
  • May 2015
  • March 2015
  • February 2015
  • January 2015
  • November 2014
  • August 2014
  • July 2014
  • June 2014
  • May 2014

Categories

  • Baby
  • Commercial
  • Creative
  • Portraits
  • Travel
  • Tutorials

Meta

  • Log in
  • Entries feed
  • Comments feed
  • WordPress.org
Theme by Colorlib Powered by WordPress
 

Loading Comments...