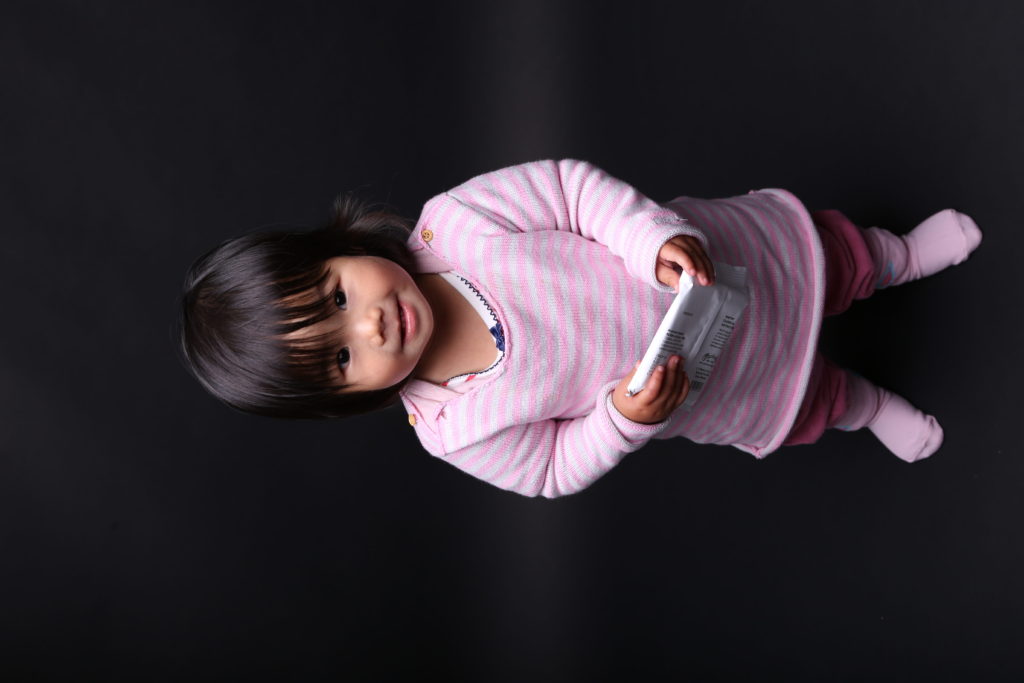
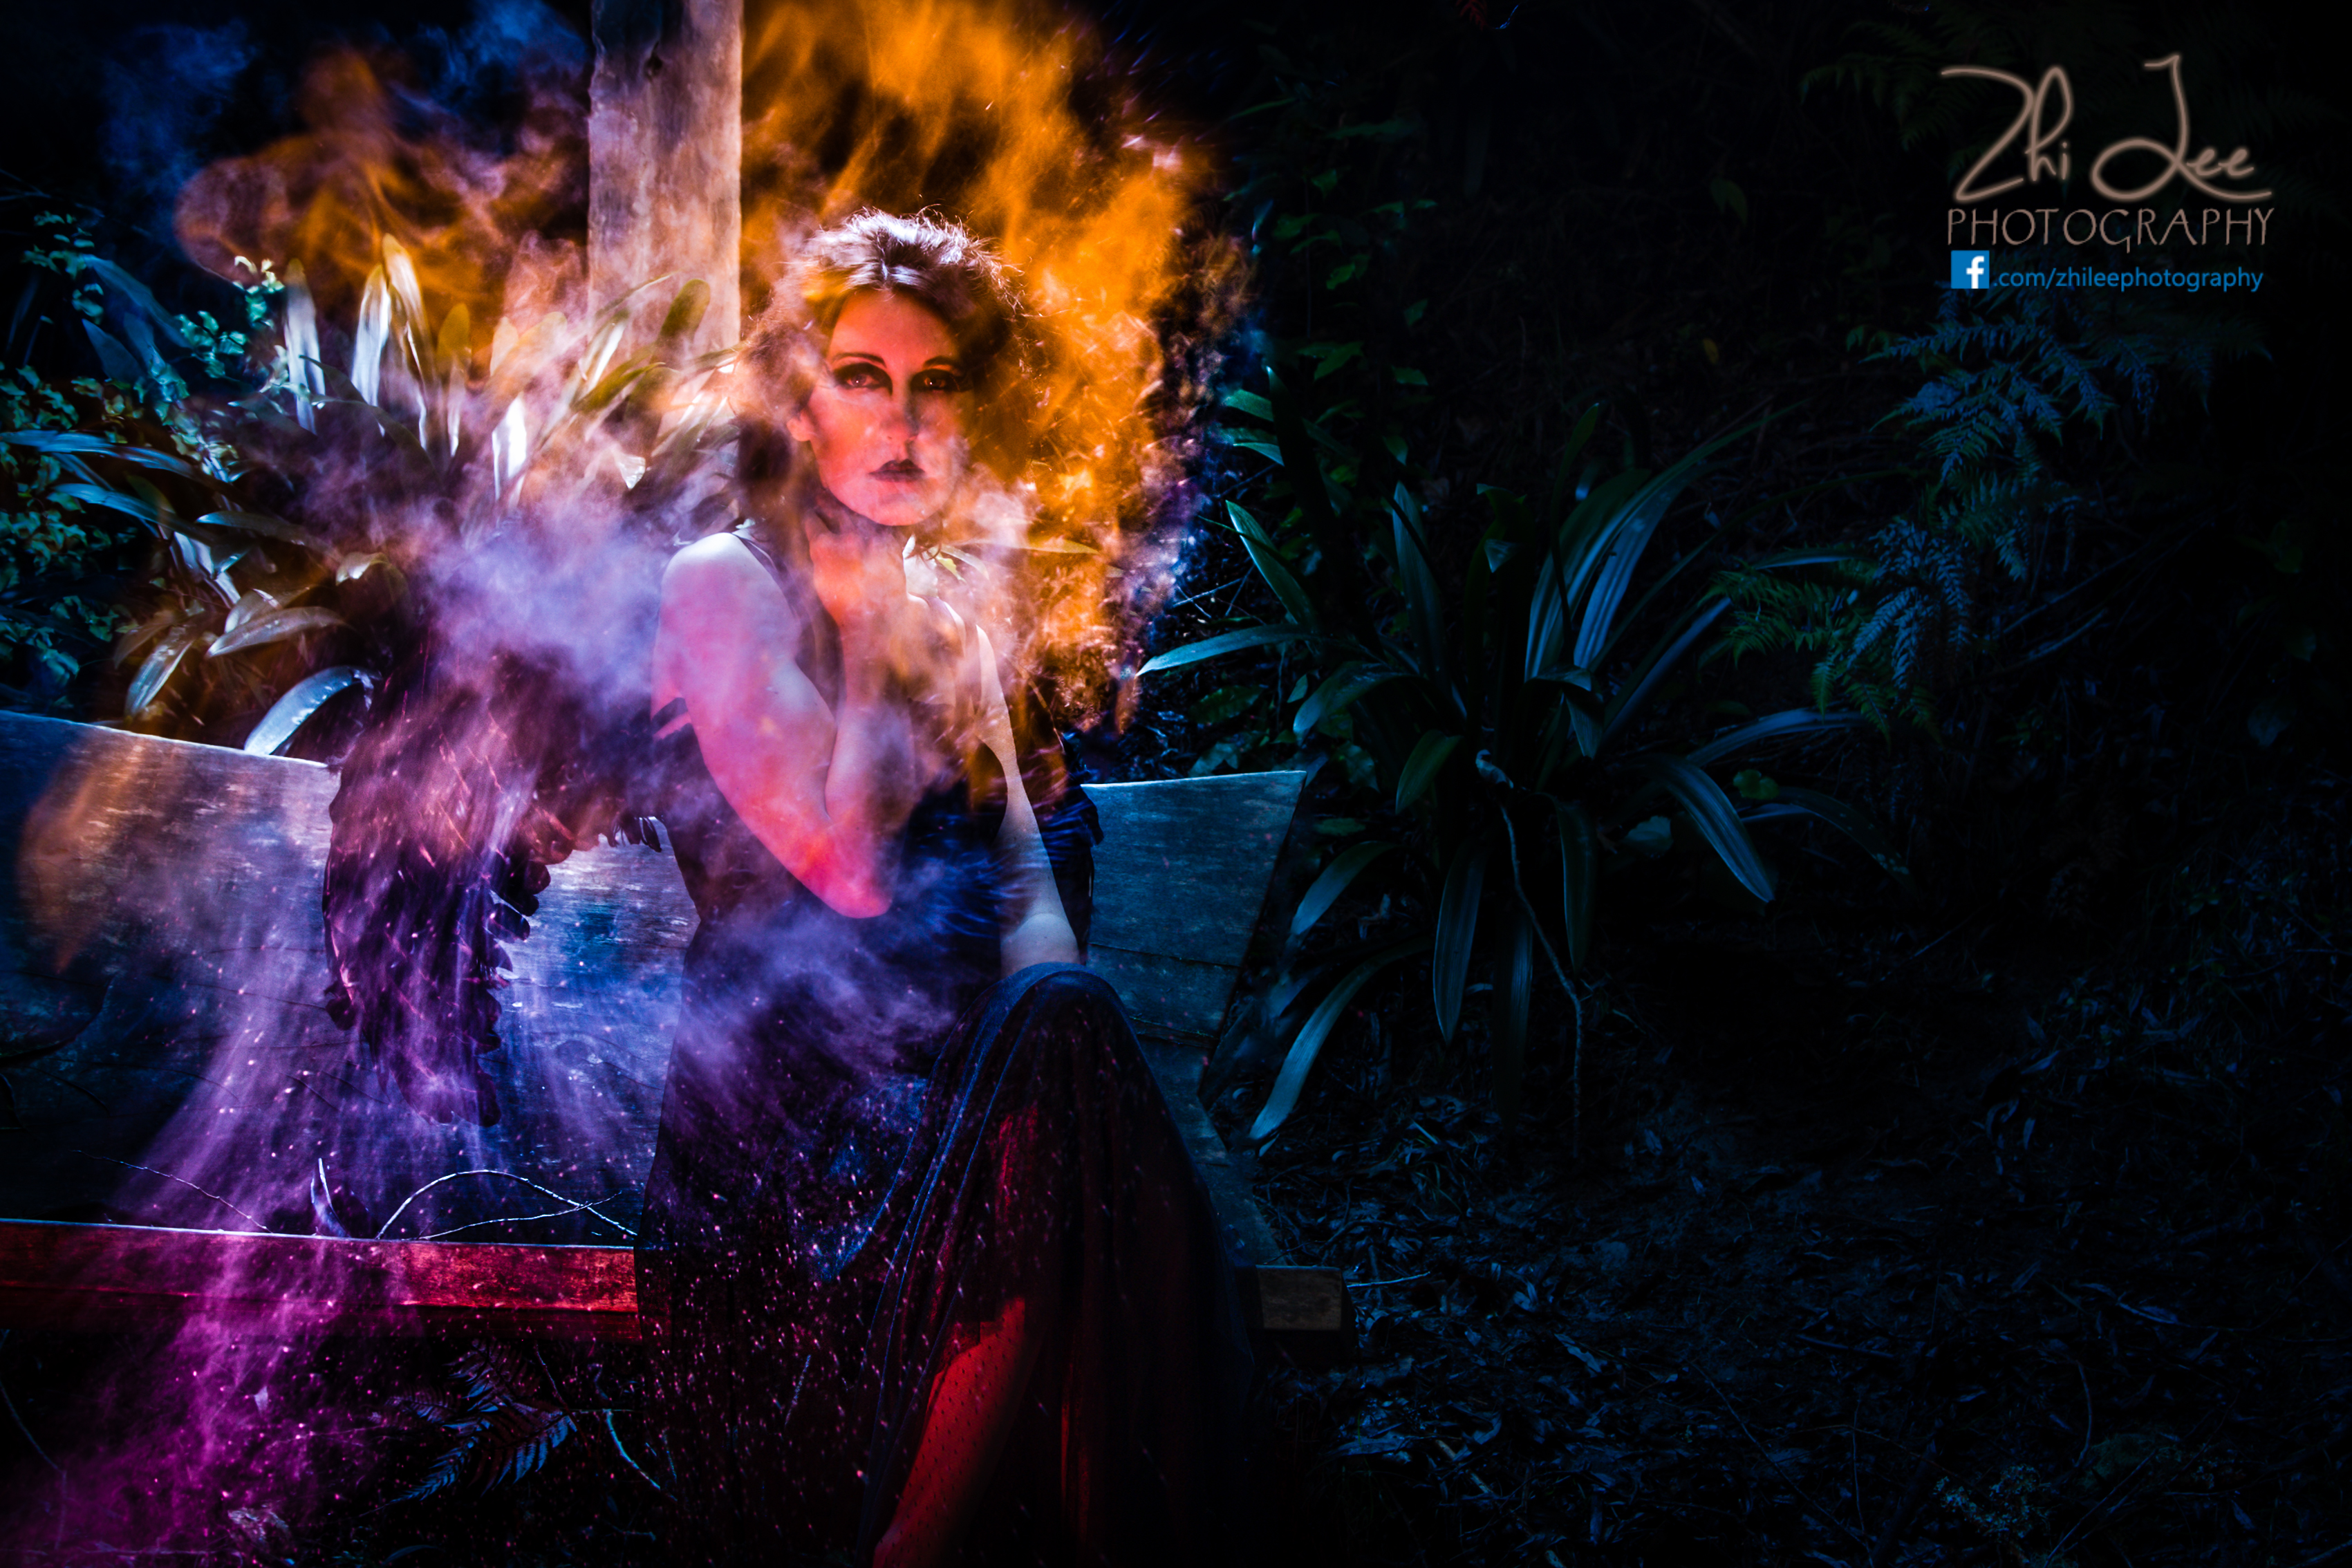
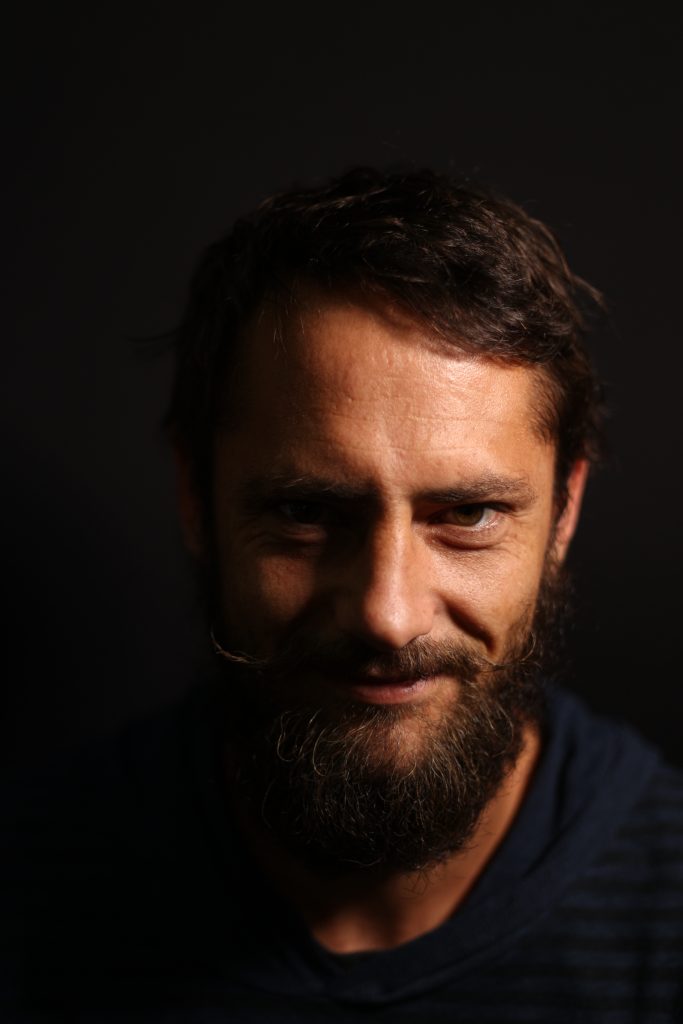
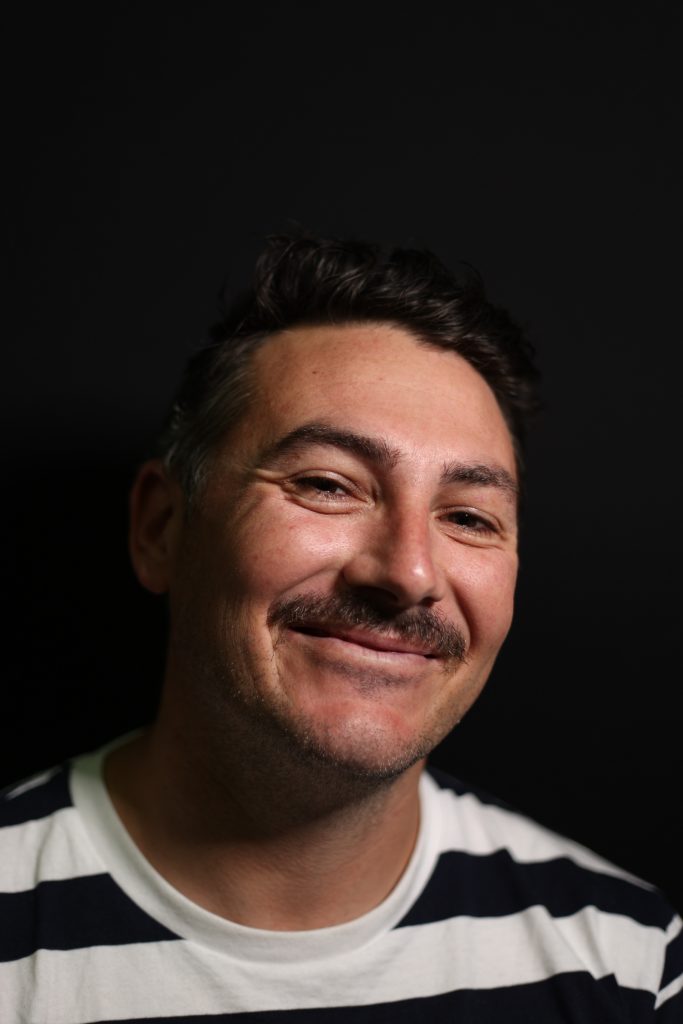
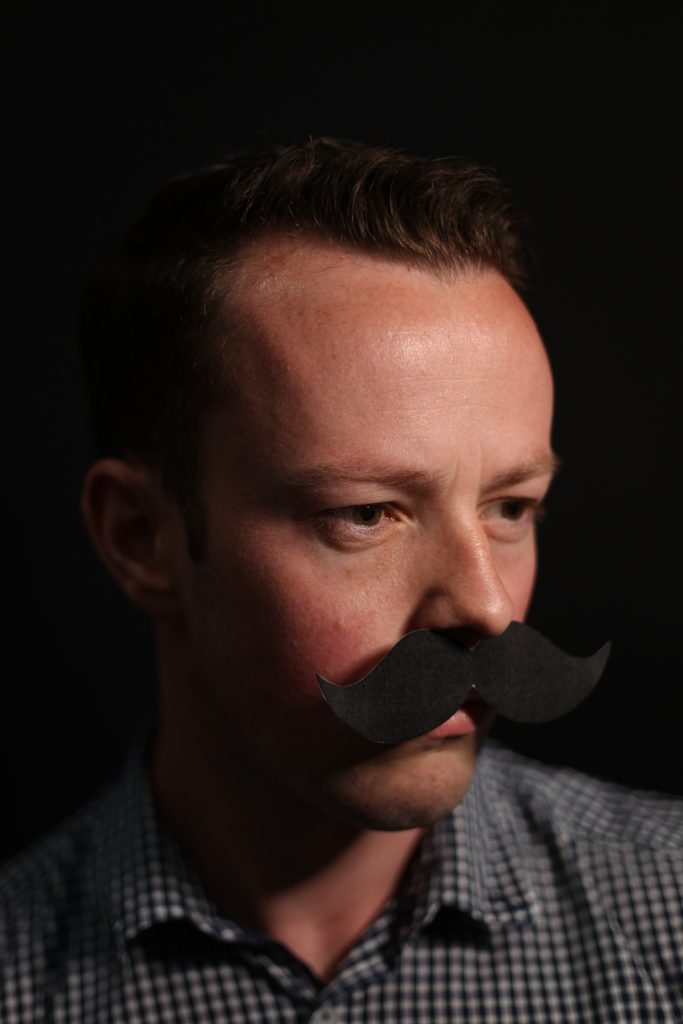
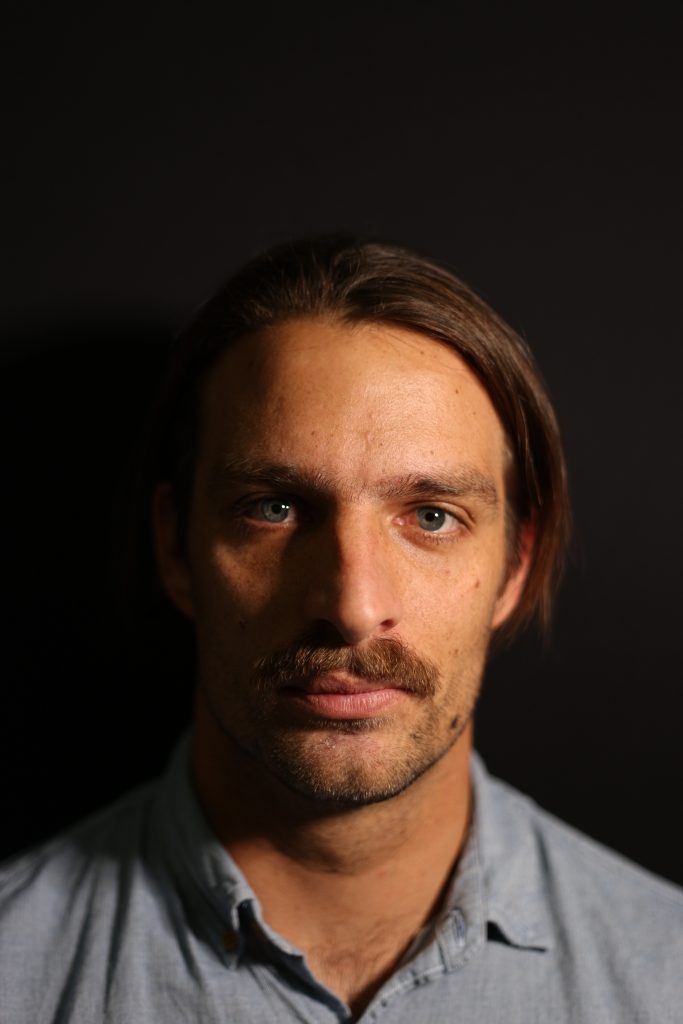
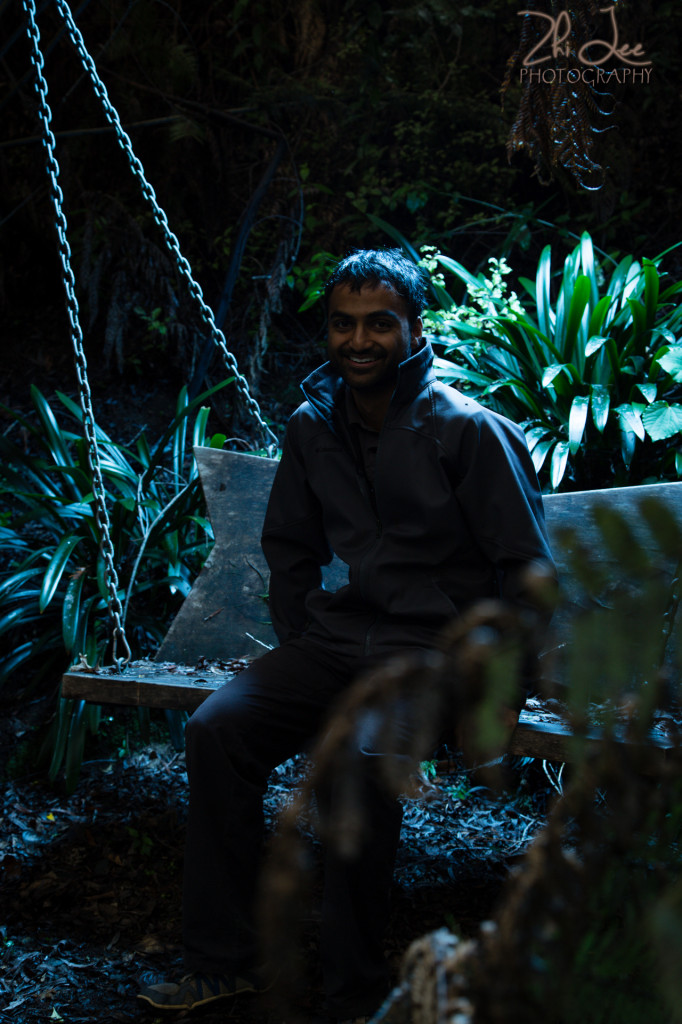
Skip to content
Zhi Lee Photography
  • About
  • Blog
  • Portfolio
    • Creative Portraits
    • Babies
    • Engagements
    • Weddings
    • Travel
    • Motion
    • Instagram
  • Weddings
    • Why Choose Us to Photograph Your Wedding
    • How are we different?
    • Investment
  • Awards
  • Contact
  • Shop

Home » Tutorials

Portraits

Movember at TradeMe

  • November 18, 2016January 7, 2017
  • by Zhi Lee

A few chaps from TradeMe Auckland are partaking in Movember to raise awareness of Men’s health.

Today we documented the mo-gress (mo progress, get it?)
Movember - Toby H
Movember - Toby D
Movember - Paul
Movember - Zach

Hit up these mo-pages and contribute to their cause:
TradeMe’s mo-page
Zachary Young mo-age
Toby Delamore’s mo-page
Toby Holland’s mo-page

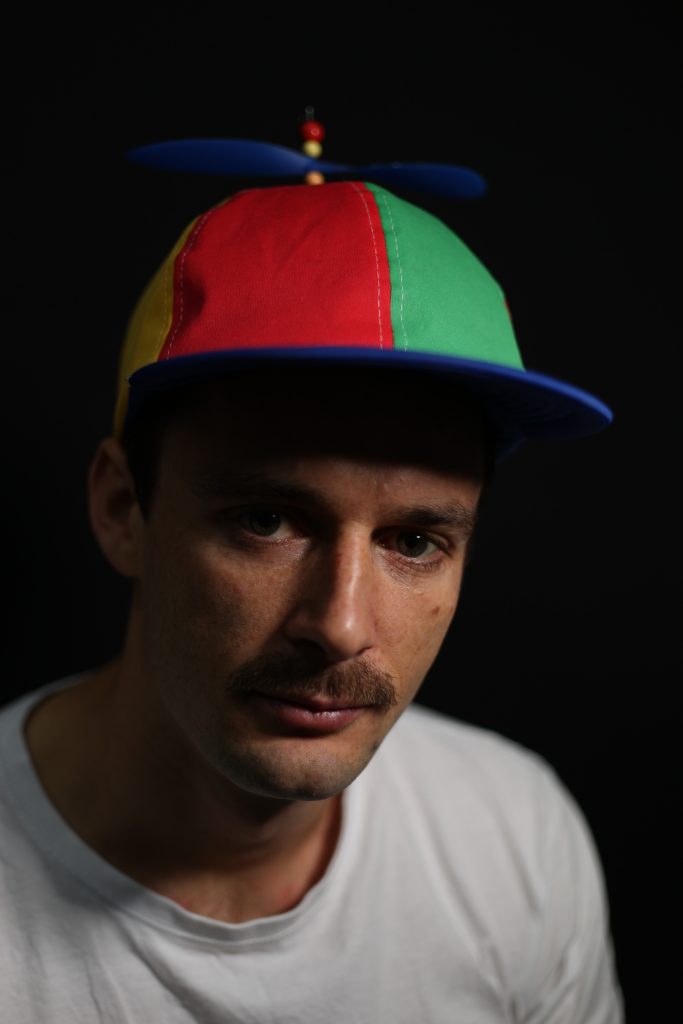
And Cody’s not actually doing Mo-vember, but he’s all mo’ed up anyway.
Movember - Cody

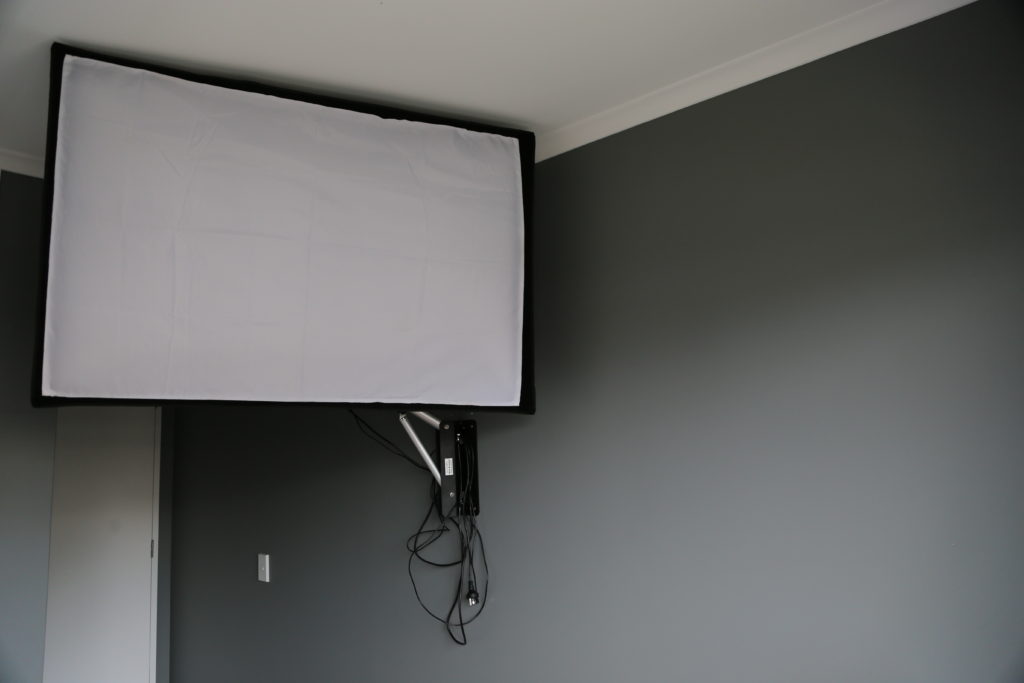
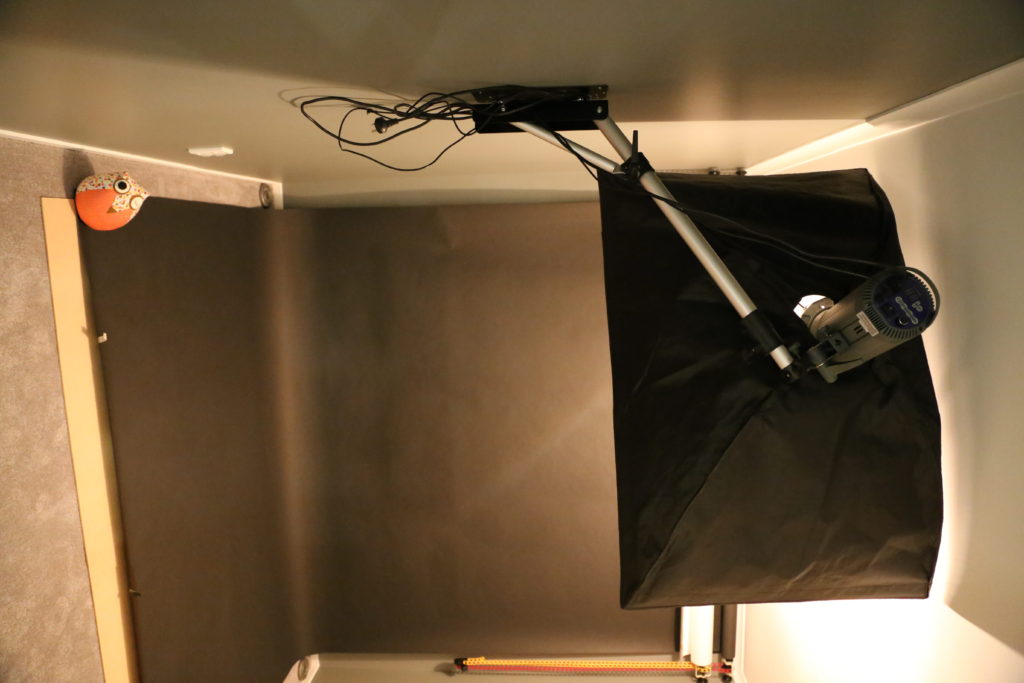
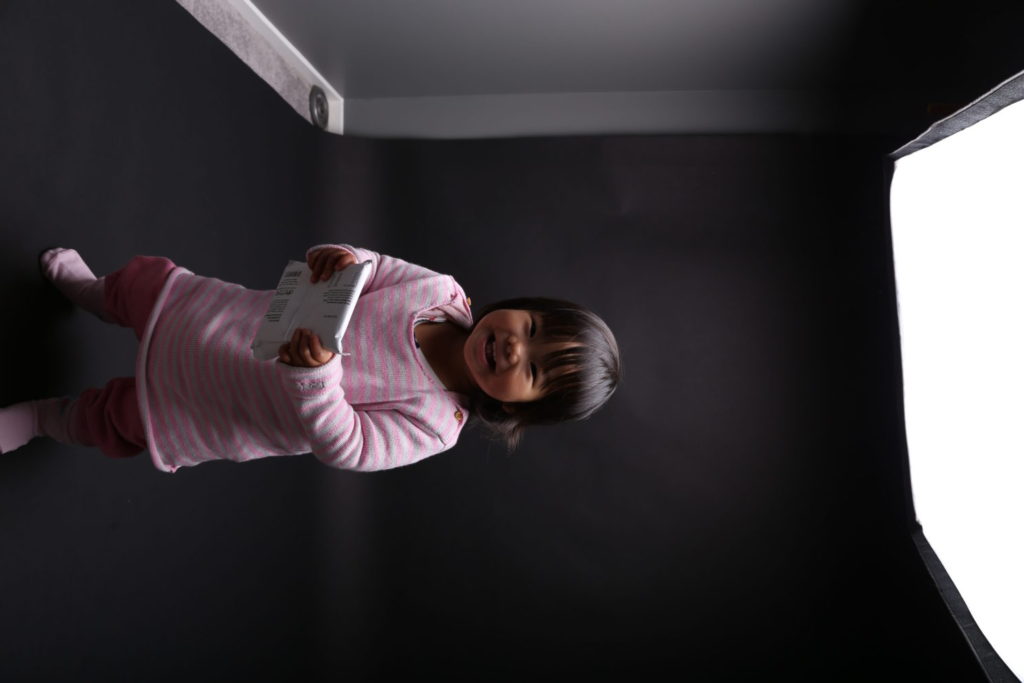
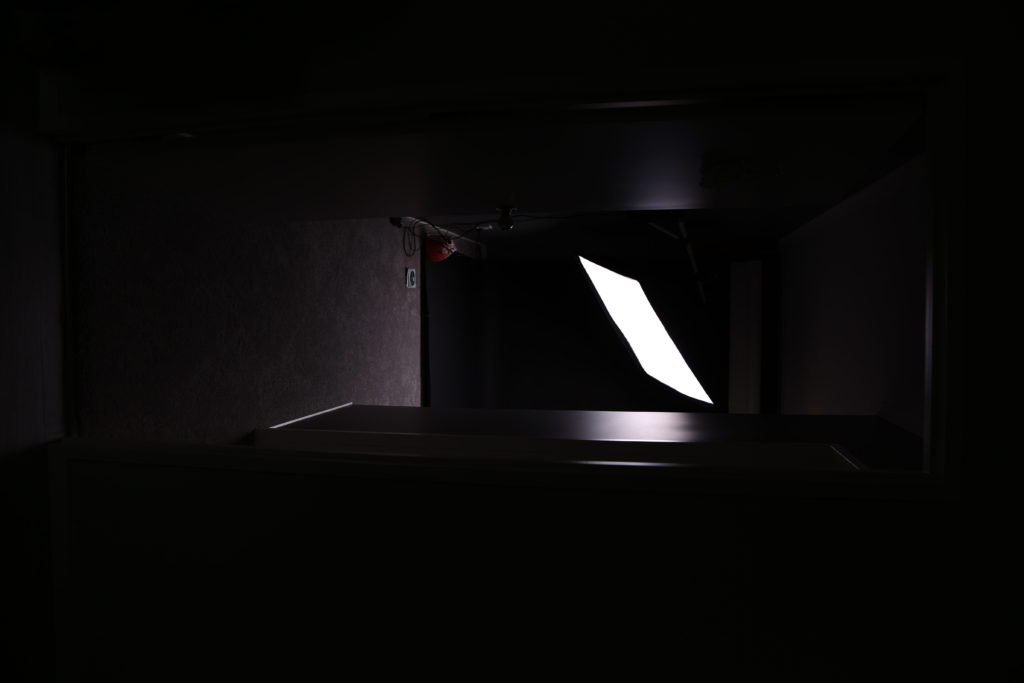
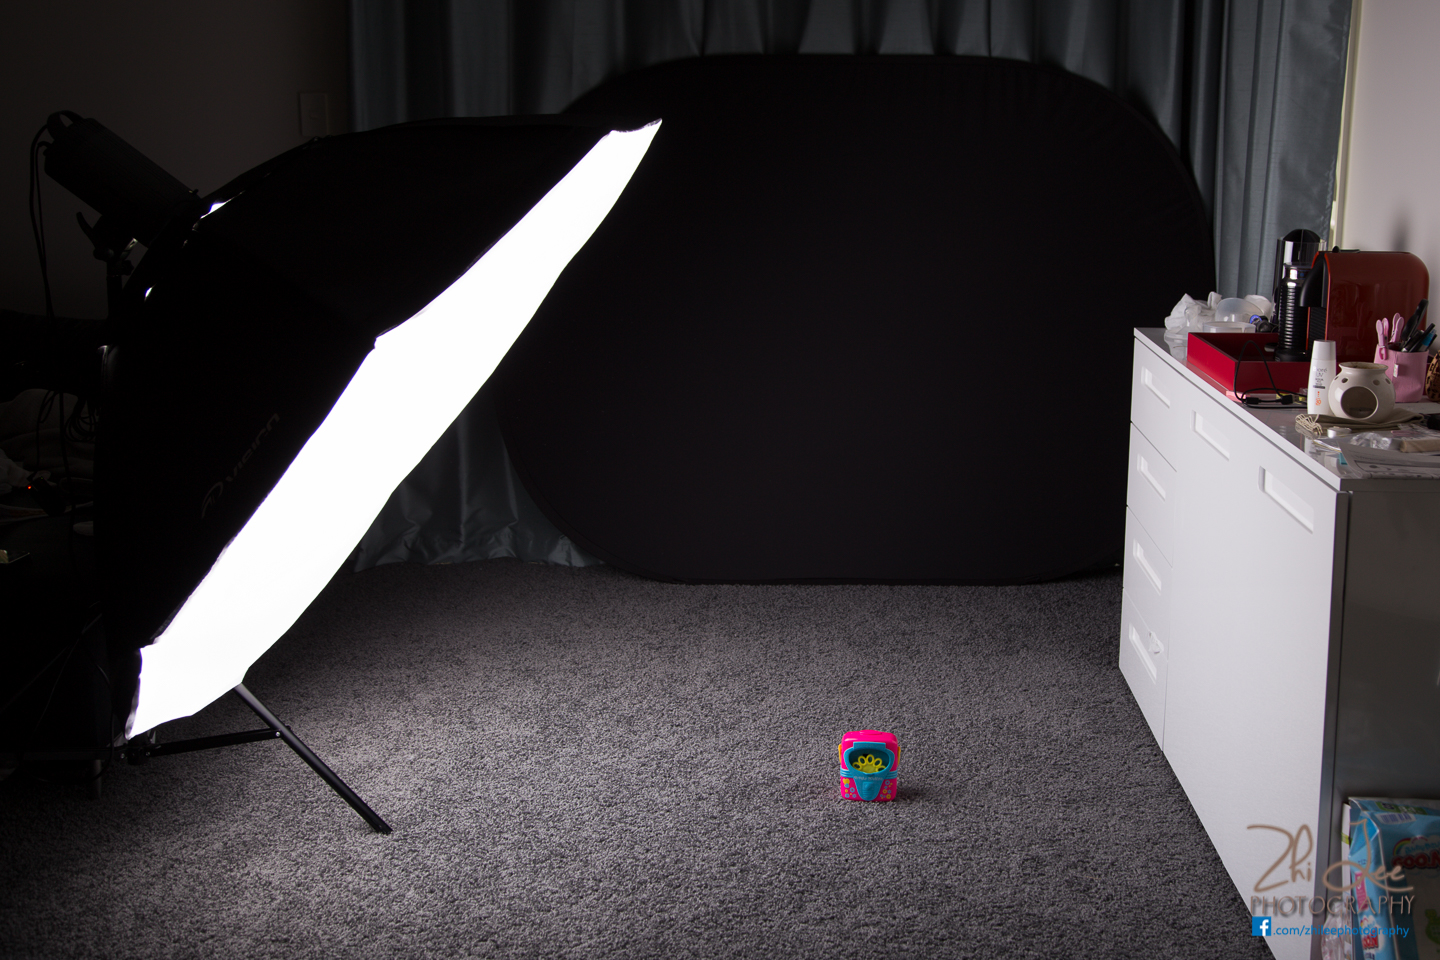
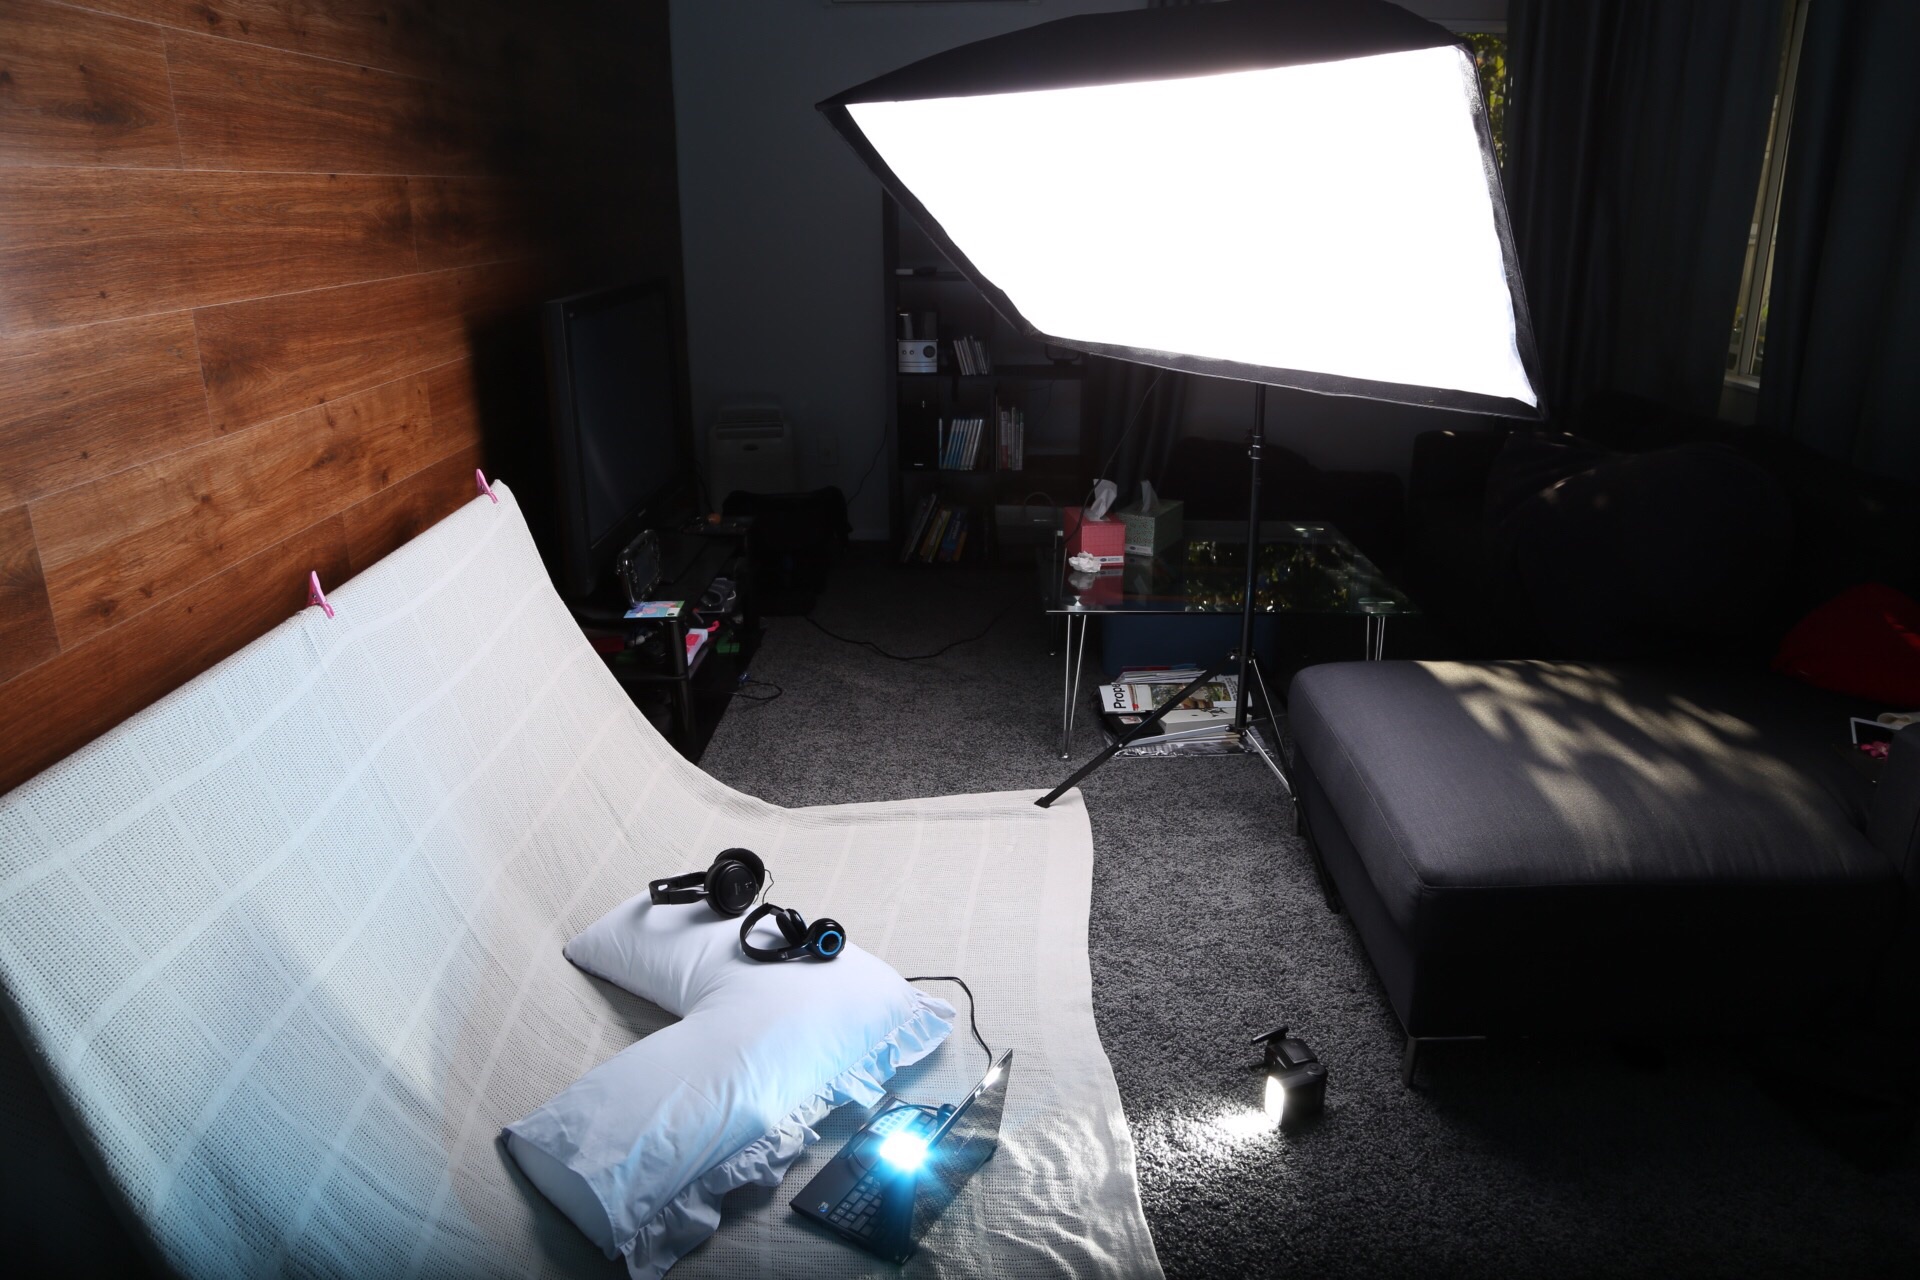
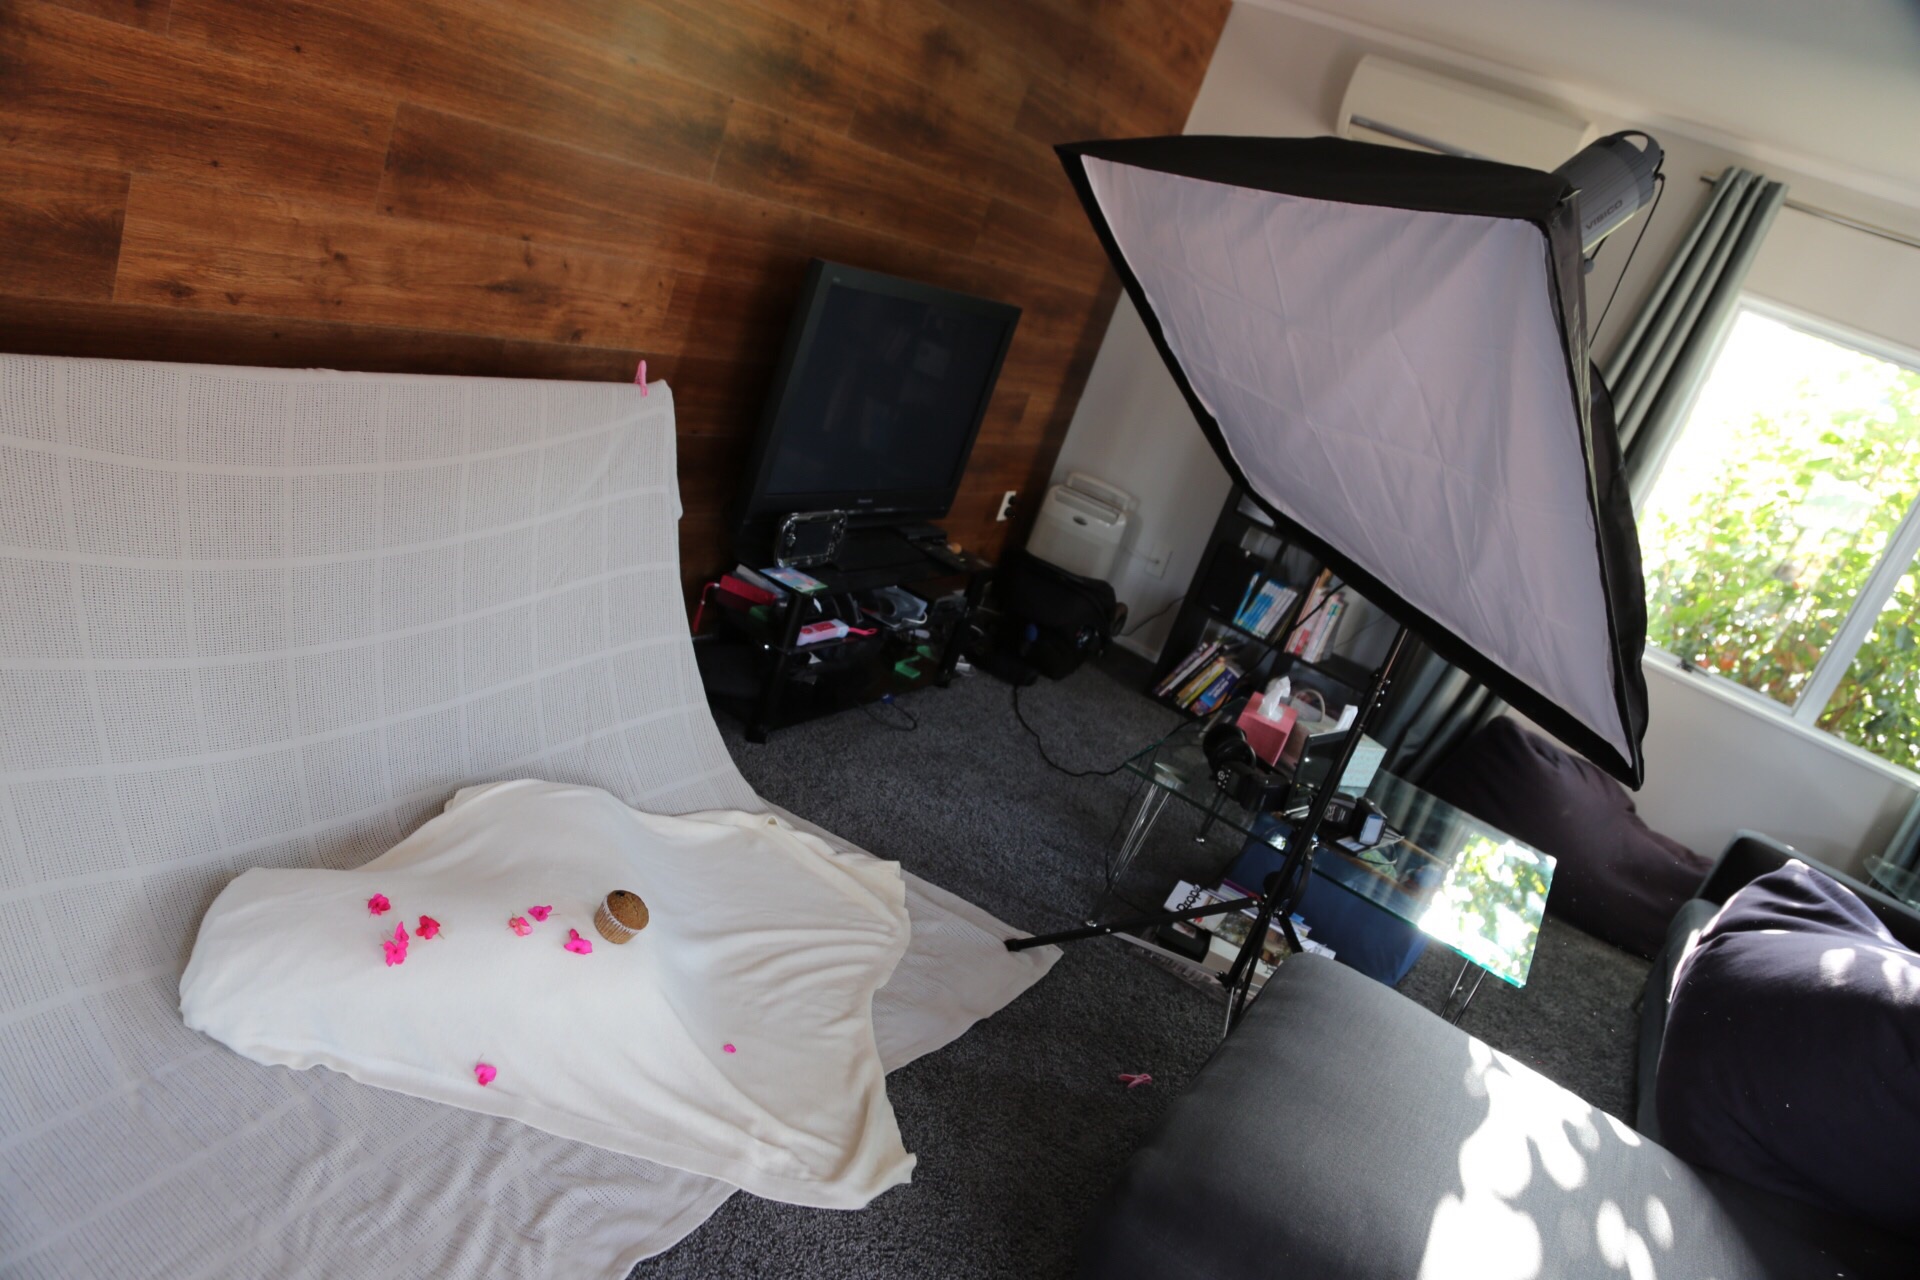
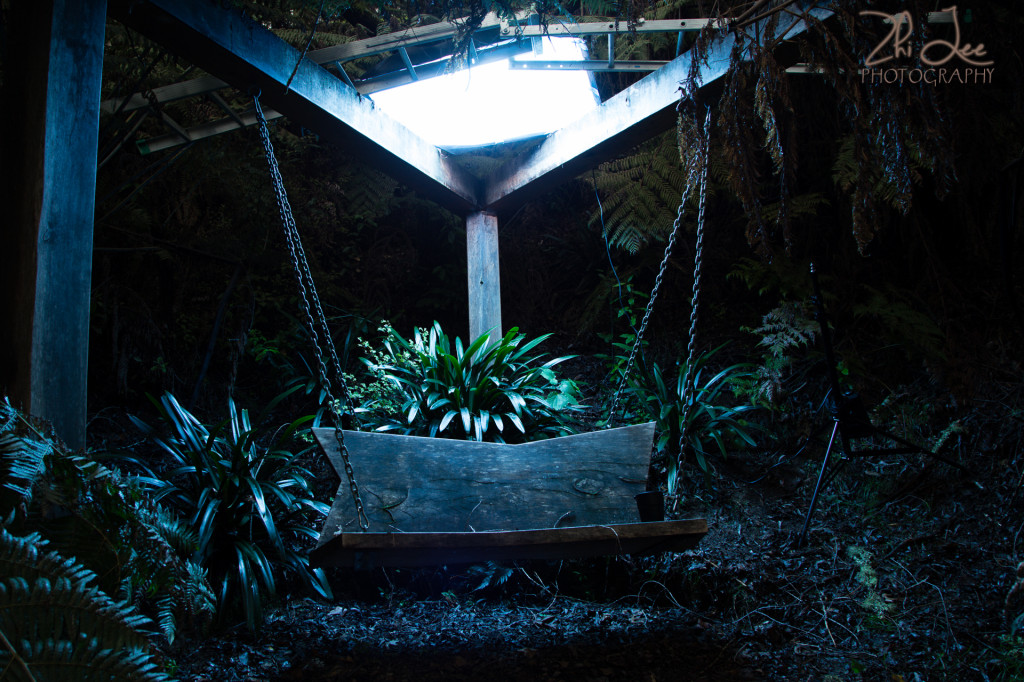
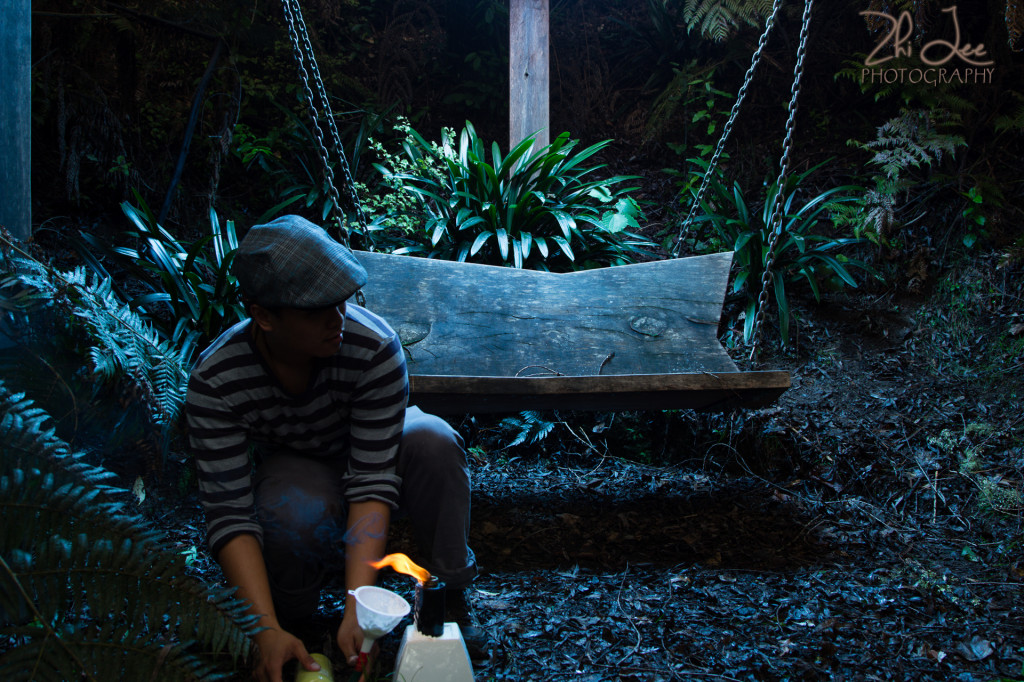
Behind-the-scenes Lighting setup

This is our lighting rig:
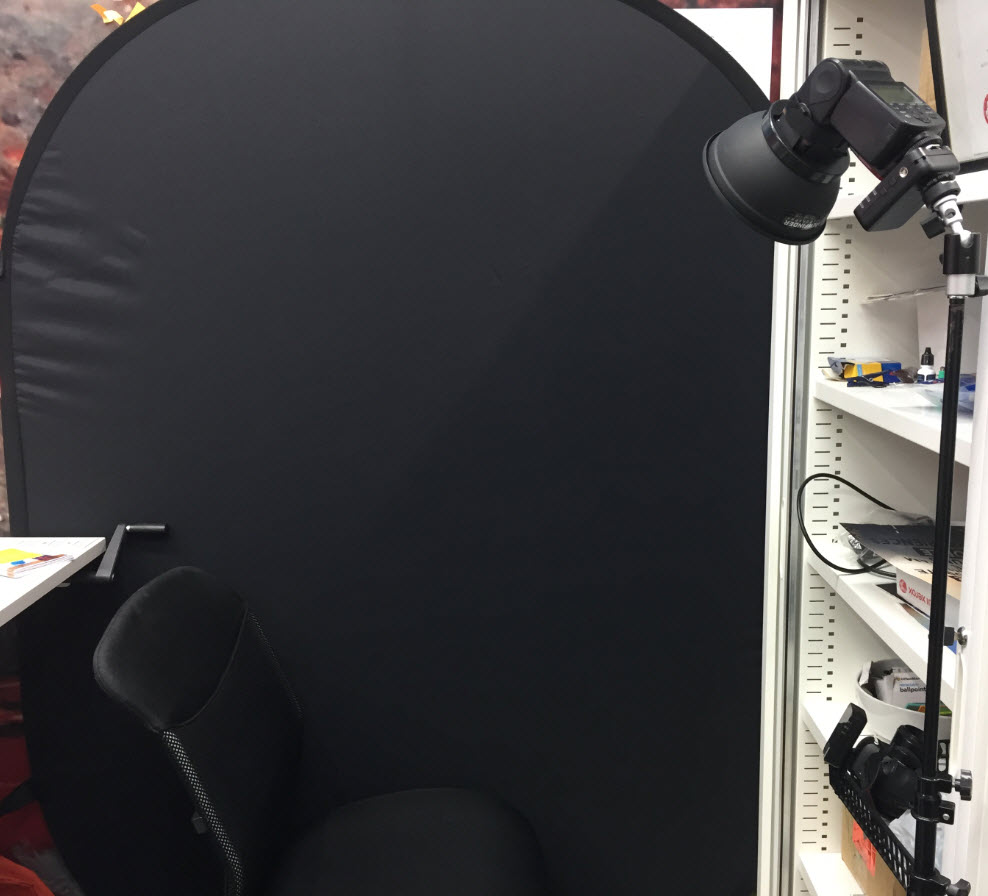
Konova portable backdrop, YN-568EXII flash, High Speed Sync, Canon 6D, 50mm, f2 ISO 50, 1/250s
  • Aperture: ƒ/2
  • Camera: Canon EOS 6D
  • Flash fired: yes
  • Focal length: 50mm
  • ISO: 50
  • Shutter speed: 1/250s
Portraits

Setting up a New Photo Studio

  • April 17, 2016April 18, 2016
  • by Zhi Lee

If you’re a part time photographer, setting up a dedicated studio space means you don’t need to set up and tear down every time you bring a client through.

This blog post describes my setup to achieve maximum results in a small space.

2 light setup. Key light camera left, kicker camera right.

Studio lighting gives a photographer total control over how light falls on their subject.  To ensure that light isn’t bouncing off every wall, a deep grey colour (Dulux Maraetai) was chosen for the walls.

I installed a Meking 2 roller wall mounted backdrop system with 2 Savage seamless paper backdrop rolls, black and white.  White backdrops are actually very versatile.  With controlled studio lighting, you can make a white backdrop appear darker, most typically grey.

Meking 2 Roller Backdrop System. Nice soft natural light from window if required.

As a carpeted floor is too soft for standing on a paper backdrop (it will crease), I bought 2 pieces of MDF thinboard to line the floor below where the backdrop fell.

Savage 2.7m Seamless Paper Backdrop and Two 1200 x 1200 MDF thinboards

My little model Mikayla tugging at the camera straps – as you can see, the option of natural light is an attractive alternative.

Give me that camera!

The backdrops had to be trimmed to 2.4m down from 2.7m.  It’s an easy job with a hacksaw.  Here’s how!

Chopped off the end of the backdrops with a hacksaw.

And here’s the hero in the room.  I couldn’t afford for light stands to get in the way so up went an Interfit INT309 Wall Mounted Boom Arm.

Interfit INT309 Wall Mounted Boom Arm - large range of motion.
Interfit INT309 Wall Mounted Boom Arm – large range of motion.


Interfit Wall Mounted Boom Arm

Look, no light stands!  All that room below the softbox!  Perfect for little (and big) models!

Visico 300WS Strobe with 80cm x 100cm softbox overhead. Unedited, straight out of camera.


Single light set up - unedited straight out of camera
Single light set up – unedited straight out of camera

This is how much control you get from a well set up studio.  I can’t wait to explore the possibilities!  This space will give me the room to polish my understanding of lighting.  I am looking forward to bringing people through my new studio.  Click here to book a studio session with me.

Digging the versatility of the Interfit boom arm. Anchored at 4 points onto wall studs.

The true hero of the day is my little angel, Mikayla.

Daddy don't forget to put your lens cap away.
Daddy don’t forget to put your lens cap away.
  • Aperture: ƒ/4
  • Camera: Canon EOS 6D
  • Flash fired: no
  • Focal length: 24mm
  • ISO: 1000
  • Shutter speed: 1/40s
Baby

Tips for Mum’s and Dad’s preparing for a Baby…

  • October 19, 2015October 18, 2019
  • by Zhi Lee


IMG_1748

I’ve been getting asked to do more baby photo shoots lately, and thought it would be a good idea to put a checklist to prepare mum, dad and bub for the session.

Baby’s Milestones

As a new parent, I am lucky to have first hand experience photographing Mikayla over the course of 12 months, from birth to 1 year old. More on that later. It’s been a valuable experience in learning how you need to adapt a shoot to baby’s age and mood. Between 1 and 2 weeks for example, they snooze a lot and like to be tucked in or swaddled – cuddly or blanket wrapped sleepy poses work best.  According to BabywearingInternational.org – after 2 weeks, newborns become less comfortable with womb-like poses.  At 1 month, they start lifting their head and responding to sound. At 3 months, baby starts holding their head and begins to get more mobile but can’t quite crawl yet. Baby centre UK have written a good article for more on baby’s milestones in their first year.

Shooting bubbles against a black backdrop. Caon 6D, 1/125s, f4.5, ISO100

Which leads me into these questions and tips that form …

The checklist:

  1. How old is bubby?
  2. Is the shoot all about bubby or will mum/dad or a sibling be in it?
  3. Do mum/dad mind using flash?  There are mixed opinions on using flash so I won’t go into that debate but I’ve been photographing my kid with flash since birth.  There are other options – natural light (e.g. windows), and continuous lighting.
  4. Bring a few props that bubby is familiar with.  This will help calm their nerves and get them acclimatized with a new environment.
  5. Ensure baby is well fed just before the session.
  6. Depending on baby’s age, if you’re going for sleeping poses (especially with a newborn), keep them awake 1-2 hours before the session so they can settle into their sleep routine on set.  Typically after the newborn stage, ensure baby is well rested just before the session so they can interact with props and the photographer.
  7. Dress baby with loose clothes to avoid lines on their skin.  Plain clothes are best, without patterns or printwork, as they detract from baby’s face.
  8. Bring a pacifier.  It’s essential!
  9. Depending on baby’s age, a typical shoot can take between 1 and 3 hours.
  10. If the shoot is on location (i.e. at home), ensure that there is a heater in the room

IMG_1731

Lastly, relax and enjoy the shoot.  It’s an awesome experience that time will never buy back!

If you’re thinking of a baby shoot in Auckland, contact me!

Mikayla 1st year1-50 sec at f - 1.850 mm50 mmISO 250ISO 250

  • Aperture: ƒ/8
  • Camera: Canon EOS 6D
  • Flash fired: no
  • Focal length: 102mm
  • ISO: 125
  • Shutter speed: 1/125s
Portraits

Photographing Babies and Bubbles Against a Black Backdrop

  • February 22, 2015
  • by Zhi Lee

I set out to photograph the growth of my beautiful daughter on a weekly basis over the span of a year.

This is week 15 and I wanted to experiment with my new 150cm Octabox.

An Octabox is an octagonal shaped softbox that produces an even quality of light with little drop off between the centre and the edges of the softbox.  You can pick one up for about $100.  Natural light will work too; all you need is a plain dark backdrop like a dark wall or wardrobe door.

Behind-The-Scenes Lighting Setup

For this image, a black backdrop was placed against curtains.  Notice the white buffet on the right serving as a soft reflector, creating gentle fill behind bubba.  Equipment: 300W Visico Strobe, 150CM Visico Octabox at 1/4 power.


Shooting bubbles against a black backdrop. Caon 6D, 1/125s, f4.5, ISO100

Achieving Complete Blackness

If you are using studio lighting, you will want to ensure that the softbox is placed pointing slightly away from the backdrop into the subject.  I had the luxury of a big octabox which wrapped around the subject so that some of the area between the subject and backdrop is still light.  If you are shooting in natural light, you will want to ensure that there are no bright spots on the backdrop (plain dark wall / door).

Creating Bubbles

To create bubbles, you will need dishwashing liquid and a bubble gun.  This is absolutely necessary because you are not going to yield many bubbles blowing into a wand manually.  You could always photoshop in more bubbles by compositing but I prefer to get everything straight out of camera.  We purchased one from The Warehouse for $10.

The Final Images

I’d highly recommend recording the growth of your baby on camera.  I wish I could do this more often!

Shooting bubbles against a black backdrop. Caon 6D, 1/125s, f4.5, ISO100
  • Aperture: ƒ/4.5
  • Camera: Canon EOS 6D
  • Flash fired: no
  • Focal length: 96mm
  • ISO: 100
  • Shutter speed: 1/125s
Creative

Creative Baby Photography As a Parent

  • January 4, 2015January 4, 2015
  • by Zhi Lee

Being a photographer dad has its bonuses.  You get a cute little model to work with 24 hours a day, and baby gets her life documented with beautiful photographs.

If there’s one thing I’d say to new parents… take as many photos as you can because you can’t turn back time!  Mikayla is now 8 weeks and growing at a phenomenal rate.  Just looking back, we wish we’d taken more photos in week 1!  We make it a point to mark every week with a unique photo, and we make the time for it.  Every Sunday is photo day.  Here are a couple of images and their lighting setups.

Canon 6D, 24-105 f4 L, Visico strobe with 80x60 soft box and couple of speedlites
Canon 6D, 24-105 f4 L, Visico strobe with 80×60 soft box and couple of speedlites

Intro to Parent Photography

Here are a few points to note about photographing as a parent.

1. Be a mobile ninja.  With the added responsibility of feeding your model, bathing her and changing nappies, try to be smart about your post-processing workflow.  With the power of wireless transfers and mobile apps, my photos are downloaded directly into my iPhone using the Canon 6D’s in built wifi connectivity.  I then edit using Google Snapseed on the phone.  Even blogging’s done on the phone while bub sleeps in my lap.

2. Think outside the box.  After doing a few shoots, I began to realise they were all “stock standard” … You know – plain background, high key lighting, boring plush toy props.  Possibilities are endless around the house when it comes to props.  Below we used a netbook, headphones and a tri-pillow (great for propping them up while feeding) to tell an interesting story.  Some day Mikayla will be as geeky as her dad.  She will love her technology toys and love great music.

3. Be patient.  While it doesn’t take much to set up a shot, it can be a bit of a wait till bub is calm and settled.  Never do a shoot with a grumpy baby.  They don’t look good and you risk making them very unhappy.


Home studio lighting setup
Lighting setup for baby headphones image – Visico 300w monolight at 4/5 power with 80x120cm softbox as key light (right diagonal above), blue gelled yongnuo speedlite at 1/4 power on laptop, yongnuo speedlite @ 1/32 in front to create reflections on laptop
Baby wants to eat cupcake!
Lighting Setup for Baby and Cupcake - Visico strobe with 80x60cm soft box from diagonal above as key light
Lighting Setup for Baby and Cupcake – Visico strobe with 80x60cm soft box from diagonal above as key light


Related Images:

Baby and Cupcake Baby Portrait
Travel

5 Day Black and White Photo Challenge – Days…

  • November 6, 2014February 22, 2015
  • by Zhi Lee

In a previous post, I shared tips on black and white photography as part of the 5 Day Black and White Photo Challenge.  5 Days, 5 Black and White photos, nominating a different photographer each day.  In this blog post, I describe the techniques used to create each image.

Black and White Asia Travel Series

I decided to pick a theme for the black and white challenge.  It happens that I’ve recently been back from a trip to Hanoi, Vietnam.  Here are a few selections.

Day 2

The layers of toys form an almost orderly chaos.  They give lots of texture and add an incredible amount of interesting detail to the image without being distracting.  The light bulbs form natural centres of attention.  They have been darkened slightly so as not to create to many contending elements.  Even though there are a few points of attraction, this image really works for me because there is so much to explore.  The expressions on the women’s faces ironically convey a sense of timelessness as they wait for time to pass.

5 Day Monochrome Challenge Day 2 - Hanoi Toy Shop
Hanoi vendors wait patiently in their street front toy shops. Canon 6D @ f/4, 1/50s, ISO-1600. By Zhi Lee

Day 3

Shot from 105mm, more “tele-photo” than a regular portrait, this compresses the image in a way that makes the subject really stand out.  A sharper depth of field was chosen so that the canvas in the foreground wouldn’t have appeared too blurry, otherwise it would have been too distracting.

Water folk at Halong Bay, Hanoi.  By Zhi Lee
Water folk at Halong Bay, Hanoi. Canon 6D @ 6/6.3, 1/160s, ISO-100

Day 4

The light from the lamp naturally creates a lit up area of interest on and around the female worker.  Other parts of the image were darkened slightly, to create a centre of focus around the main subject.

Embroidery Halong Bay, Hanoi
Disabled workers respectfully earning their keep near Bat Trang Ceramic Village, Halong Bay, Hanoi. Canon 6D @ f/4, 1/100s/ ISO-2500. By Zhi Lee

Day 5

I’d say don’t be afraid of using high ISOs, especially if you’re using a full-frame, or even cropped sensor SLR.  This was shot handheld.  The lines created by the building adds a lot of interest to the image without the need for colour.

La Salle College of the Arts in Singapore. By Zhi Lee
The La Salle College of the Arts in Singapore. A fine campus that has won 3 international architectural awards. Canon 6D @ f/4, 1/25s, ISO-6400. By Zhi Lee

Day 1

Last but not least, the first image of the series.  The metal bars lead the viewer into the subject, which is placed on a third from the right.  Subjects placed on thirds have extra emphasis according to the rule of thirds.

A welder in Hanoi uses his hands as a screen. By Zhi Lee


  • Aperture: ƒ/4
  • Camera: Canon EOS 6D
  • Focal length: 58mm
  • ISO: 1600
  • Shutter speed: 1/50s

Related Images:

Corbans Estate Hip Hop Corbans Estate Hip Hop Hanoi Toy Shop Thailand Temple Roofs
Portraits

5 Day Black and White Photo Challenge – Day…

  • November 2, 2014November 2, 2014
  • by Zhi Lee

I was nominated by George Lim Photography to participate in the 5 Day Black and White Challenge.  For 5 days I have to post one monochrome image each day while challenging another photographer to do the same.  This is Day 1 and I’m nominating Sean Dick of Evoke Studio.

Monochrome photos pose a challenge in themselves.  Being devoid of colour, you’re left with only variances in light to convey your message.


Black and White Photography Tips

Here are some tips when applying a black and white treatment.

Use composition to lead the eye

This applies to both colour and monochrome photography.  Leading the eye to parts of the image helps capture the attention of the viewer.  In black and white photography, you’re unable to use bright colours to lead the viewer.  Fall back to using interesting shapes, tones, textures and leading lines to enhance the composition.  In the image below, I placed the subject a third in from the right of the image (rule of thirds), and used the metal beams running from the bottom right to the subject to lead the eye into image.

Pay attention to the quality of light

They say that light makes a photograph.  This is more so with a black and white image.  Dark areas form the black parts of the image, and bright areas conversely form the lighter/whiter parts of the image.  Look for interesting variances in light.  Soft light adds a calming quality to the image, whereas harsh/strong light creates a more edgy look.

Use contrast to make subjects pop

Contrasting areas in an image can draw the viewer’s attention.  On the other hand, less contrasting areas (e.g. a uniform area of grey) are happy to just sit back and blend into the unnoticed.  In the image below, the bright spot from the welding gun naturally draws the viewer’s eye towards it.  The weld gun is starkly contrasted with the man holding it.  The dichotomy between light and dark around the welder makes this a very strong image.


A welder in Hanoi uses his hands as a screen. By Zhi Lee
  • Aperture: ƒ/4
  • Camera: Canon EOS 6D
  • Focal length: 105mm
  • ISO: 100
  • Shutter speed: 1/400s

Related Images:

Eiffel Tower San Marco Square iNight Scene Pantheon Ceiling Hanoi Toy Shop Thailand Temple Roofs Spanish Steps
Creative

Planning your photography with a makeup artist

  • August 23, 2014August 23, 2014
  • by Zhi Lee

The Thought Behind the Makeup

When putting together a themed shoot, as we did with ours, it’s important to collaborate with the makeup artist on the concept.   I had the privilege of working with Lisa Robb who not only grasped the concept, but added her own spin to it.   Lisa is a qualified Makeup Artist who’s work ranges from weddings, special occasions and events to fashion shows, film/TV and special effects!  Here are some tips from us, and Lisa’s rationale behind the hair and make-up which really made the shoot a success!  Thanks to Lisa for contributing to this blog post.

Tips for photographers collaborating with hair / makeup artists (HMUA)

1. Open Communication – Exchange samples for what you are visualising.  We exchanged a number of images we got from Google and discussed how to complement each model’s look with hair and makeup.  We did this over a few weeks and Lisa even sent me sketches.

2. Agree on the theme – Use a few keywords to describe the mood, lighting and post-processing effects.  For our shoot, the keywords were – “dark”, “angel”, “fantasy”, “mystery”, “fallen” and “elegant”.

3. Get to know them – We created a Facebook group for models, videographers, photographers and HMUA to get to know each other.  It formed an open forum for discussions and agreeing on the schedule of the day, the storyboard, and who was bringing what props / clothes.

Rationale (by Lisa)

For this Dark Angel shoot I took inspiration from movies like Hunger Games and Underworld. I wanted to create something that was both dark and mystical but also angelic to portray both good and evil.

Makeup Sketch by Lisa Robb

When developing my ideas for Alisha I wanted her eyes to be the main focal point. I achieved this by making them black and using white eyeliner to enhance their size. I went for black and white contrast to show rebellion and confusion. I chose to make her skin tone pale to show a lack of belonging in this world “Angel fallen from Heaven.”

Model: Alisha Fitzpatrick Makeup: Lisa Robb
Model: Alisha Fitzpatrick
Makeup: Lisa Robb

With Katrina I wanted to show her as a majestic creature, with fairy tale characteristics of innocence and mystery.

Makeup Sketch by Lisa Rob
Makeup Sketch by Lisa Robb

I wanted her intentions in this world to be questionable “is she good? or is she evil?”I used pearl and black rhinestones to add to the fantasy and bright pink blush around her temples and down her cheek bones to soften her appearance. To create a halo I used a soft fountain braid in her hair and then added random curls and waves to fit with the forest theme.

This is the face chart used for Katrina on the day of the shoot.  After being shown examples of what the client is after I will draw up a face chart or two with my interpretation to show we are both on the same track. I will often mix and match aspects of each face chart as well as add or remove features to suit the model, theme and time allocations. I will also list down what colours and products I intend to use. This makes application on the day faster and straightforward.


Makeup face chart by Lisa Robb

“A makeup face chart is used by makeup artists to test out or plan a look. They are also used to record a look that has been tried on someone else, like for a photo shoot or bridal trial. Makeup face charts are useful to have because they help you keep track of all the different products and color combinations that were used, in the event that you wish to recreate the look again in the future.”  Excerpt from Totalbeauty.com

Model: Katrina McCloy Makeup: Lisa Robb
Model: Katrina McCloy
Makeup: Lisa Robb

Final Results

Model: Katrina McCloy Makeup and Hair: Lisa Robb Photographer: Zhi Lee
Model: Katrina McCloy
Makeup and Hair: Lisa Robb
Photographer: Zhi Lee
Model: Alisha Fitzpatrick Makeup and Hair: Lisa Robb Photographer: Zhi Lee
Model: Alisha Fitzpatrick
Makeup and Hair: Lisa Robb
Photographer: Zhi Lee

Related Images:

Early morning makeup Life Art Life Art
Creative

Hot Angel Photo Shoot – Lighting setups explained

  • July 22, 2014
  • by Zhi Lee

A little behind the scenes and explanation of our lighting setup for those wondering how it came together!

A 80cm x 120cm strobe with blue cellophane in front of the outer baffle, prepped cautiously on a ladder on top of the pergola.  This gives off a blueish light, perfect for the night lighting we wanted to create.
A 80cm x 120cm strobe with blue cellophane in front of the outer baffle, prepped cautiously on a ladder on top of the pergola. This gives off a blueish light, perfect for the night lighting we wanted to create.  We wanted to create a rim light coming from high above slightly from the back.  This would create an angelic effect around the model as if the light were from the heavens.
Testing the top lighting
Here’s the effect of the blue rim light from above the pergola. And our very charming and talented pyrotechnics man Vijay, without whom none of this would have been possible.
Setting up the source of fire
We ripped the top off a garden citronella oil burner which you can get from your local hardware store for about $5. It was perched on top of a ceramic pot. A funnel filled with fine cornflour (the cornflour was passed through a sieve to make it very fine) was placed against the base of the fire pointing upwards.
Dark Angel Photo Shoot - Lighting Setup Take 1
This was one of our first takes with the lighting and photo setup. Looking good, Sean.
Dark Angel Lighting Setup
Now we decided, we wanted a bit of red in the flames to add a bit of heat and interest. This would also mask the parts of the cornflour dust cloud that hadn’t burned (shutter pressed too early) or had already burned (shutter pressed too late). The WHITE cornflour would be given a RED tint. A speedlight with a red gel was placed at the base of the flame pointing upwards.
Dark angel photo shoot - Behind the scenes with model Katrina McCloy
Shooting through the flames, we managed to create the effect that the angels were actually burning. Model: Katrina McCloy
Dark angel BTS with Katrina McCloy
An outdoor shoot doesn’t come without challenges. Not only was our gear splattered with mud, so were our models feet! Model Katrina McCloy being a great sport!

The Final Images

Model: Alisha Fitzpatrick Makeup and Hair: Lisa Robb Photographer: Zhi Lee
Model: Alisha Fitzpatrick
Makeup and Hair: Lisa Robb
Photographer: Zhi Lee
Model: Katrina McCloy Makeup and Hair: Lisa Robb Photographer: Zhi Lee
Model: Katrina McCloy
Makeup and Hair: Lisa Robb
Photographer: Zhi Lee


Creative Portrait lit with Fire and Red Flash Against a Black Backdrop. By Zhi Lee
Yours Truly, Your Creative Man Zhi Lee
  • Aperture: ƒ/5.6
  • Camera: Canon EOS 6D
  • Focal length: 32mm
  • ISO: 100
  • Shutter speed: 1/100s
Tutorials

Photography Inspiration from Google Images

  • June 30, 2014
  • by Zhi Lee

Lately I’ve been getting lots of inspiration from Google Images for my creative work and stumbled across a neat feature that’s worth sharing!!

Google recognizes that you’re looking for photography inspiration if you type in “photography ideas“.

And it organises them by category for you.

Typing "photography ideas" into google images gives you nicely categorised ideas for your next photography project!
Typing “photography ideas” into google images gives you nicely categorised ideas for your next photography project!


And if you’re looking for ideas in a particular genre or category, type it in!

“Creative Portrait Photography Ideas” yields this!

Using Google Images for photography inspiration

Thank you, Google!


Posts navigation

1 2

Recent Posts

  • Beautiful Marlborough Sounds
  • Movember at TradeMe
  • Trade Me Auckland Office Photos
  • Setting up a New Photo Studio
  • Tips for Mum’s and Dad’s preparing for a Baby Photo Shoot

Archives

  • December 2016
  • November 2016
  • October 2016
  • April 2016
  • October 2015
  • May 2015
  • March 2015
  • February 2015
  • January 2015
  • November 2014
  • August 2014
  • July 2014
  • June 2014
  • May 2014

Categories

  • Baby
  • Commercial
  • Creative
  • Portraits
  • Travel
  • Tutorials

Meta

  • Log in
  • Entries feed
  • Comments feed
  • WordPress.org
Theme by Colorlib Powered by WordPress
 

Loading Comments...